Summary
Power Automate and word/excel templates can be used to generate documents but there are a few limitations: updating the word template or excel template can be frustrating if you need to add or remove columns later on. The use of plain text controls can also have issues with formatted rich text, this can be particularly problematic if you want to extract the contents of notes and email activities which contain formatting. The word online Power Automate connectors are also premium connectors which can be avoided.
In this post we create a flow to:
- Get related contact records e.g. all activity types, emails, notes, cases for a contact into a single table
- Handle rich text (formatted) notes and add that into the table with formatting
- Tailor the style, or the columns based on the data, and without editing word templates/plain text controls
Instead of using word templates we can generate the code (HTML) with Power Automate to for the table. You need to understand how to create an HTML table, but you can use AI or this article https://www.w3schools.com/html/html_tables.asp to see the structure.
You can also copy your organization’s CSS style file to style the HTML that you produce and convert it into a PDF. Or use one of the many sites to generate CSS to style the table. You decouple styling the table from the content – you don’t need to try and style word or excel documents that have plain text controls.
By using Power Automate to construct the HTML table directly you can handle rich text in the table items (e.g. contents of formatted notes). You also don’t need to mess around downloading and reformatting the word template (potentially breaking the flow when you reupload with controls removed, as well as using rich text controls etc. with repeatable items). You can make changes just by editing the Power Automate flow statements and logic.
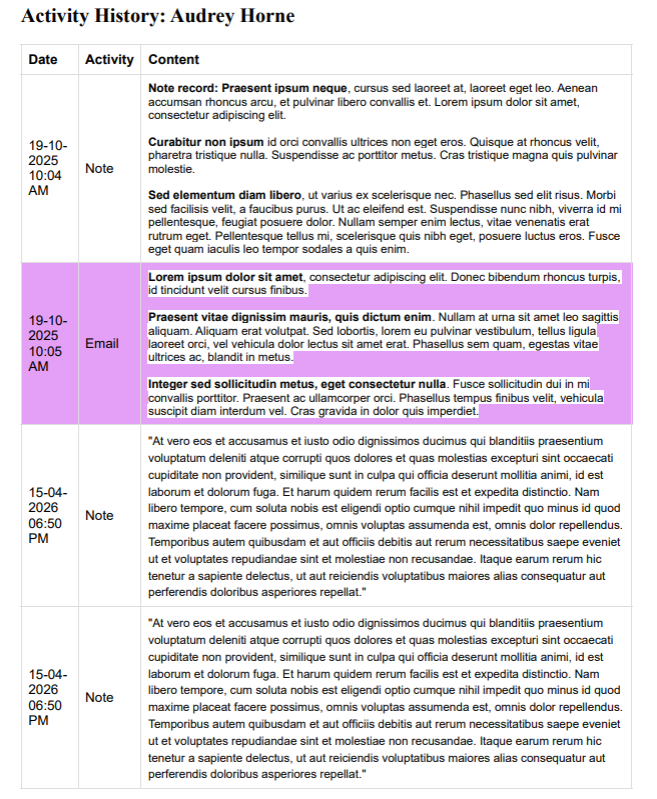
After we get related activities/records for the contact record we put them into a single table, order them by date and use it to produce a table so you can see the history of interactions for the contact. This can be useful for subject access requests or audit requests.
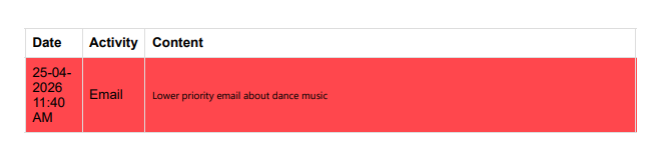
You can also dynamically set the CSS say on the table rows to style different parts based on the data in the row. E.g. all emails that have high priority are shaded with a red background.
How it works
- Build an HTML table string in your flow
- Inject dynamic data into rows
- Apply styling via CSS
- Output as:
- Email body
- PDF (via HTML-to-PDF step)
- Stored document
If you’re unfamiliar with HTML tables, this is sufficient, you can even edit the HTML and run to see how you need to modify it for your use case
Benefits with this approach
1. Full control over structure
- Add/remove columns by editing the flow
- No template sync issues
2. Native support for rich text
- HTML fields (e.g. formatted notes) render correctly
- No hacks with plain text controls
3. No premium connectors required
- Avoid Word Online dependencies entirely
4. Styling is reusable
- Apply your organisation’s CSS
- Consistent output across documents
- Use online sites to generate CSS for your table
Trade-offs
- Requires basic HTML understanding
- Debugging string-based HTML in flows can be clunky
- Less “visual” than template-based approaches
Practical Use Case: Contact Activity Timeline
For audit or subject access requests you may need to produce a document with records associated with an account:
- Emails
- Notes
- Activities
- Cases
We can do this by
- Normalize the different related records into a single dataset
- Sort by date
- Render as a chronological HTML table
- Convert HTML into PDF
Outcome
- A complete interaction history in one view
- Easy export to PDF
- Ideal for:
- Auditing
- Customer reviews
- Subject Access Requests (SAR)
How to build the Power Automate Flow
The full end to end flow is below, with more screenshots and information for the steps after that. This flow is triggered against a row – in this case the contact record.
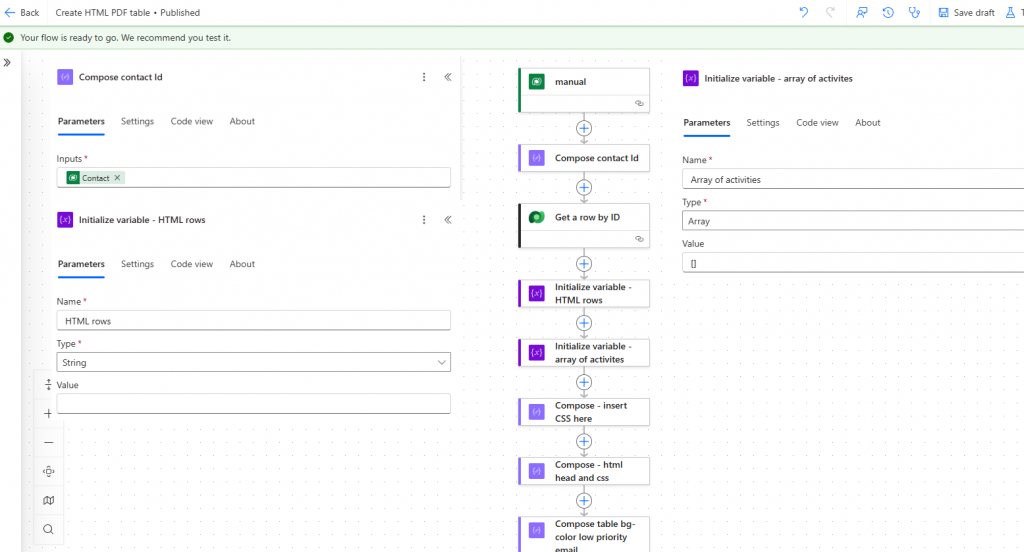
Contents of Scope
Detail for the flow steps
Compose – Insert CSS
You can use AI or online sites to generate this for you
table {
  font-family: arial, sans-serif;
  border-collapse: collapse;
  width: 100%;
}

td, th {
  border: 1px solid #dddddd;
  text-align: left;
  padding: 8px;
}
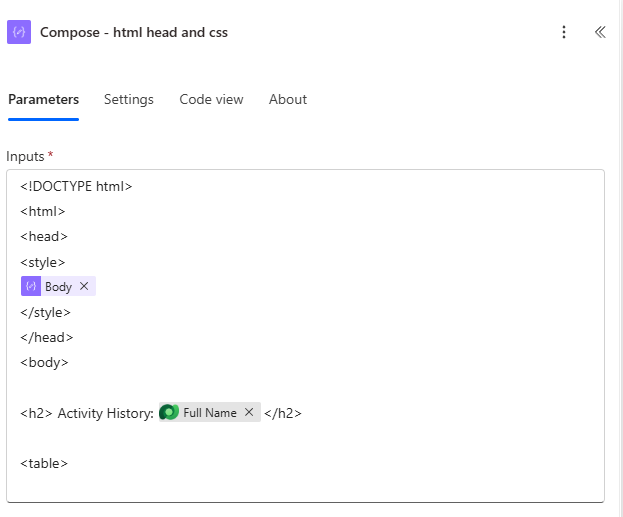
Compose HTML head and CSS
This is the structure of the HTML page and we add the CSS at the top and the start of the table (with the <table>) we add further HTML later
<!DOCTYPE html>
<html>
<head>
<style>
@{outputs('Compose_-_insert_CSS_here')}
</style>
</head>
<body>

<h2> Activity History: @{outputs('Get_a_row_by_ID')?['body/fullname']}</h2>

<table>
Compose table background colors here’s the CSS for the background color used in the <style> when constructing the HTML.
background-color: #E4A0F7;
background-color: #FF474D;
Compose table head, this is the structure for a three column table, you can change this depending on your use case.
<thead>
<tr>
<th>Date</th>
<th>Activity</th>
<th>Content</th>
</tr>
</thead>
<tbody>

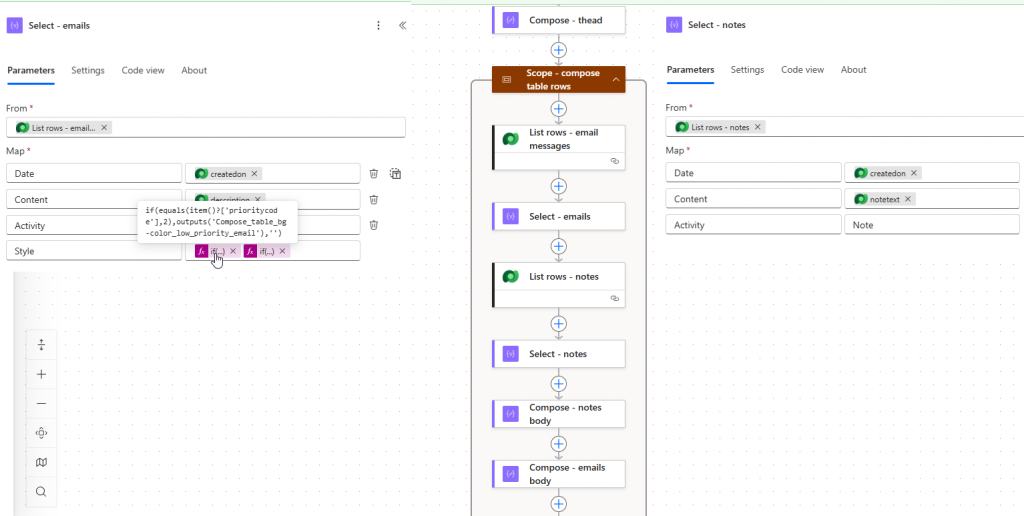
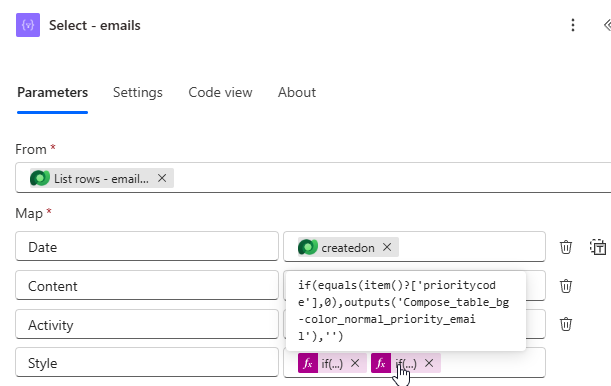
Select – Emails/Notes/Etc.
We can use expressions in the select that iterates over the emails so that the style formatting is conditional on the data. So here we store different CSS depending on the color the background of the table differently depending on normal or low prioritycode – the email priority level:
if(equals(item()?['prioritycode'],0),outputs('Compose_table_bg-color_normal_priority_email'),'')

if(equals(item()?['prioritycode'],2),outputs('Compose_table_bg-color_low_priority_email'),'')
This could be done better by using CSS classes etc, but for this post we just paste the raw CSS in each row.
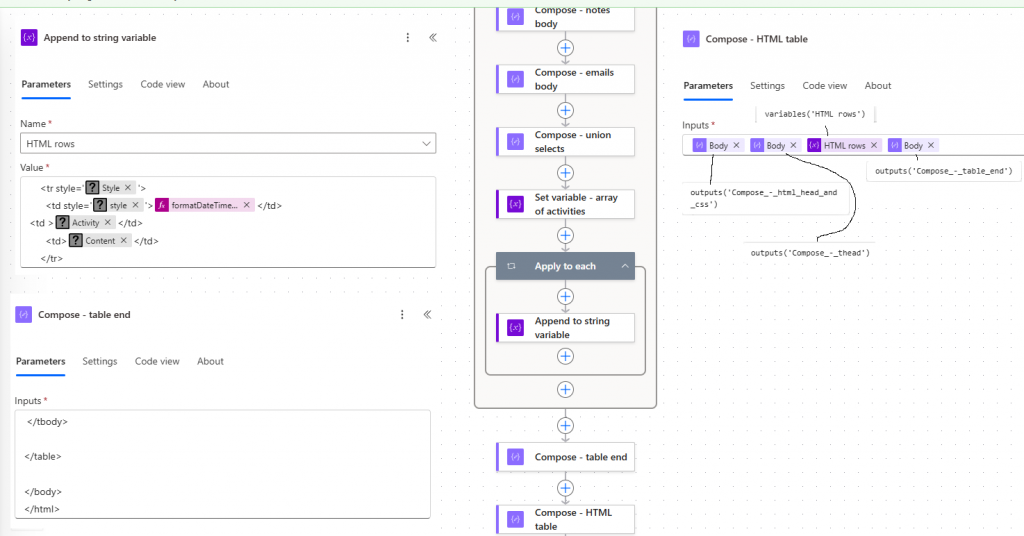
For each associated record type, notes, emails, etc. we add them to a select for the columns Date, Content, Activity, Style – this produces one normalized format for all the different activity types.
We then use a union with the select statements to put the items together for notes, emails etc., and sort by date
sort(union(body('Select_-_notes'),body('Select_-_emails')),'Date')Finally use an apply to each to append each item to a string variable, here we construct the HTML for each table row using the style, activity, content, date properties in each array item, we reference the item()?[‘style’] to set the CSS styling for the rows.
    <tr style='@{item()?['Style']}'>
      <td style='@{item()?['style']}'>@{formatDateTime(item()?['Date'],'dd-MM-yyyy hh:mm tt')}</td>
<td >@{item()?['Activity']}</td>
      <td>@{item()?['Content']}</td>
    </tr>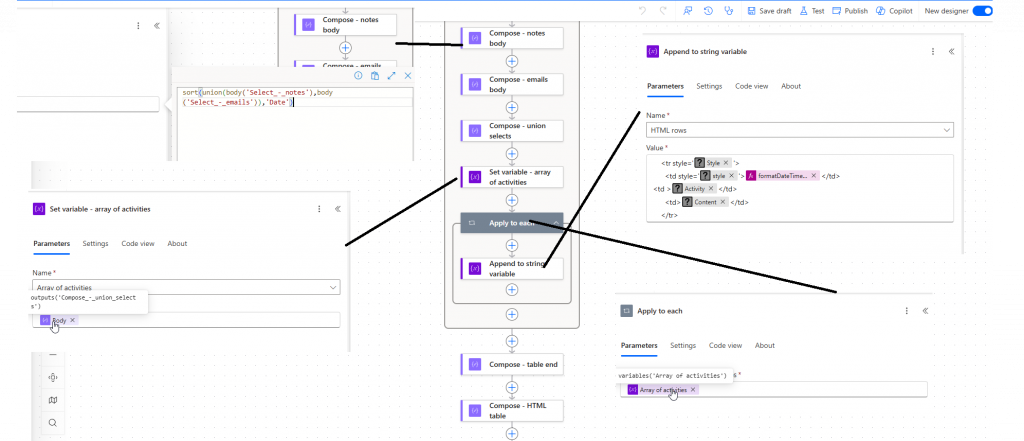
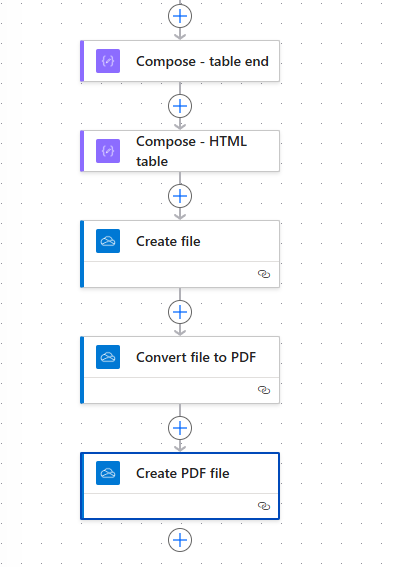
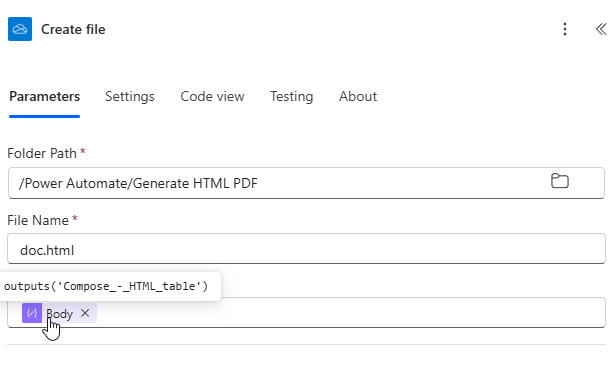
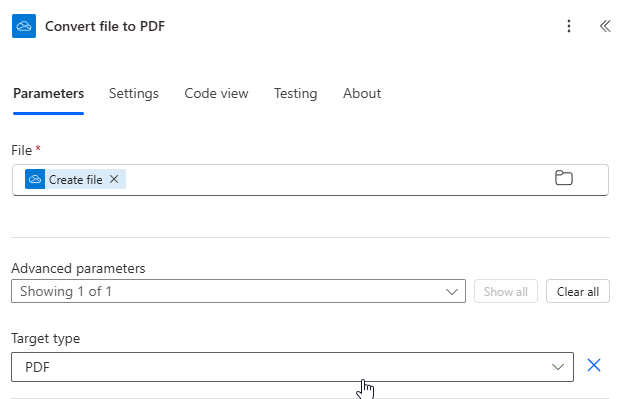
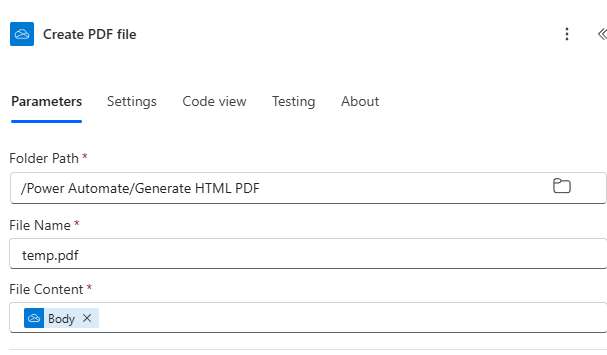
File creation and save PDF
Create file to be converted and saved to PDF
Convert file to PDF
Create PDF file
Example Output
Here’s the example output, with backgrounds colored for the emails to indicate priority levels. Depending on the complexity of your notes, you may need more elaborate CSS to format the content